Colorado Driver's Permit Diagnostic Quiz
Find your weak spots before you book the test. 10 questions drawn from the topics the Colorado driver manual spends the most time on. You'll see which topics need work the moment you finish; enter your email at the end and we'll send the full ranked plan with exact scores and the chapters to study next.
Colorado Driver's Permit Diagnostic Quiz (10 questions). Correct answers and explanations follow each question.
-
1. What does this sign require of a driver turning left when the signal shows a solid green ball?
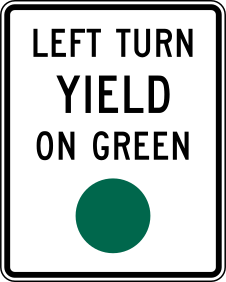
- Yield to oncoming traffic before completing the turn. (correct)
- Come to a full stop at the line, then turn when clear.
- Turn without yielding, because the green ball protects the turn.
- Wait for a green arrow; the circular green does not allow a left turn.
Why: The placard restates the permissive left-turn rule: on a circular green ball, a driver may turn left but must first wait for a safe gap in oncoming traffic. The trap is the choice that treats the green ball as a protected turn, which is what a green arrow does; the placard is posted precisely because the ball does not protect the turn.
-
2. This pavement marking is painted across your lane at a stop-controlled intersection. Where must you bring your vehicle to a stop?

- Before any part of the vehicle crosses the line. (correct)
- With the front bumper directly over the line.
- At the curb of the cross street.
- Anywhere within one car length past the line.
Why: The stop line marks the exact boundary the vehicle must remain behind at a stop sign or red signal; the entry says to bring the front of the vehicle to a complete halt before any part of it crosses the line. The tempting wrong pick is stopping with the bumper directly over the line: drivers read the bar as a target to line up with rather than a boundary they may not cross, so they pull forward until the front wheel or bumper rests on the paint.
-
3. What does this Be Prepared To Stop sign require of a driver approaching it?
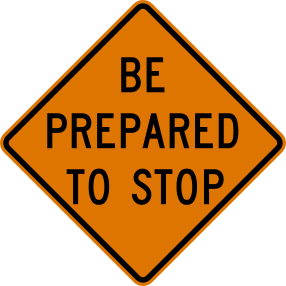
- Reduce speed and be ready to brake because traffic ahead may stop without warning. (correct)
- Stop at the sign and wait for a flagger to wave you through.
- Merge left immediately because the right lane is closing ahead.
- Yield to workers and equipment entering the roadway from the shoulder.
Why: The orange diamond warns that traffic ahead may halt without notice at a flagger, a signal, or the back of a queue. Ease off the accelerator, open up your following distance, and cover the brake so you can stop firmly if a stopped line appears around the next curve. The trap is the answer that treats the words 'prepared to stop' as an order to halt at the sign itself; a diamond flags what is coming, not the point where the driver actually stops.
-
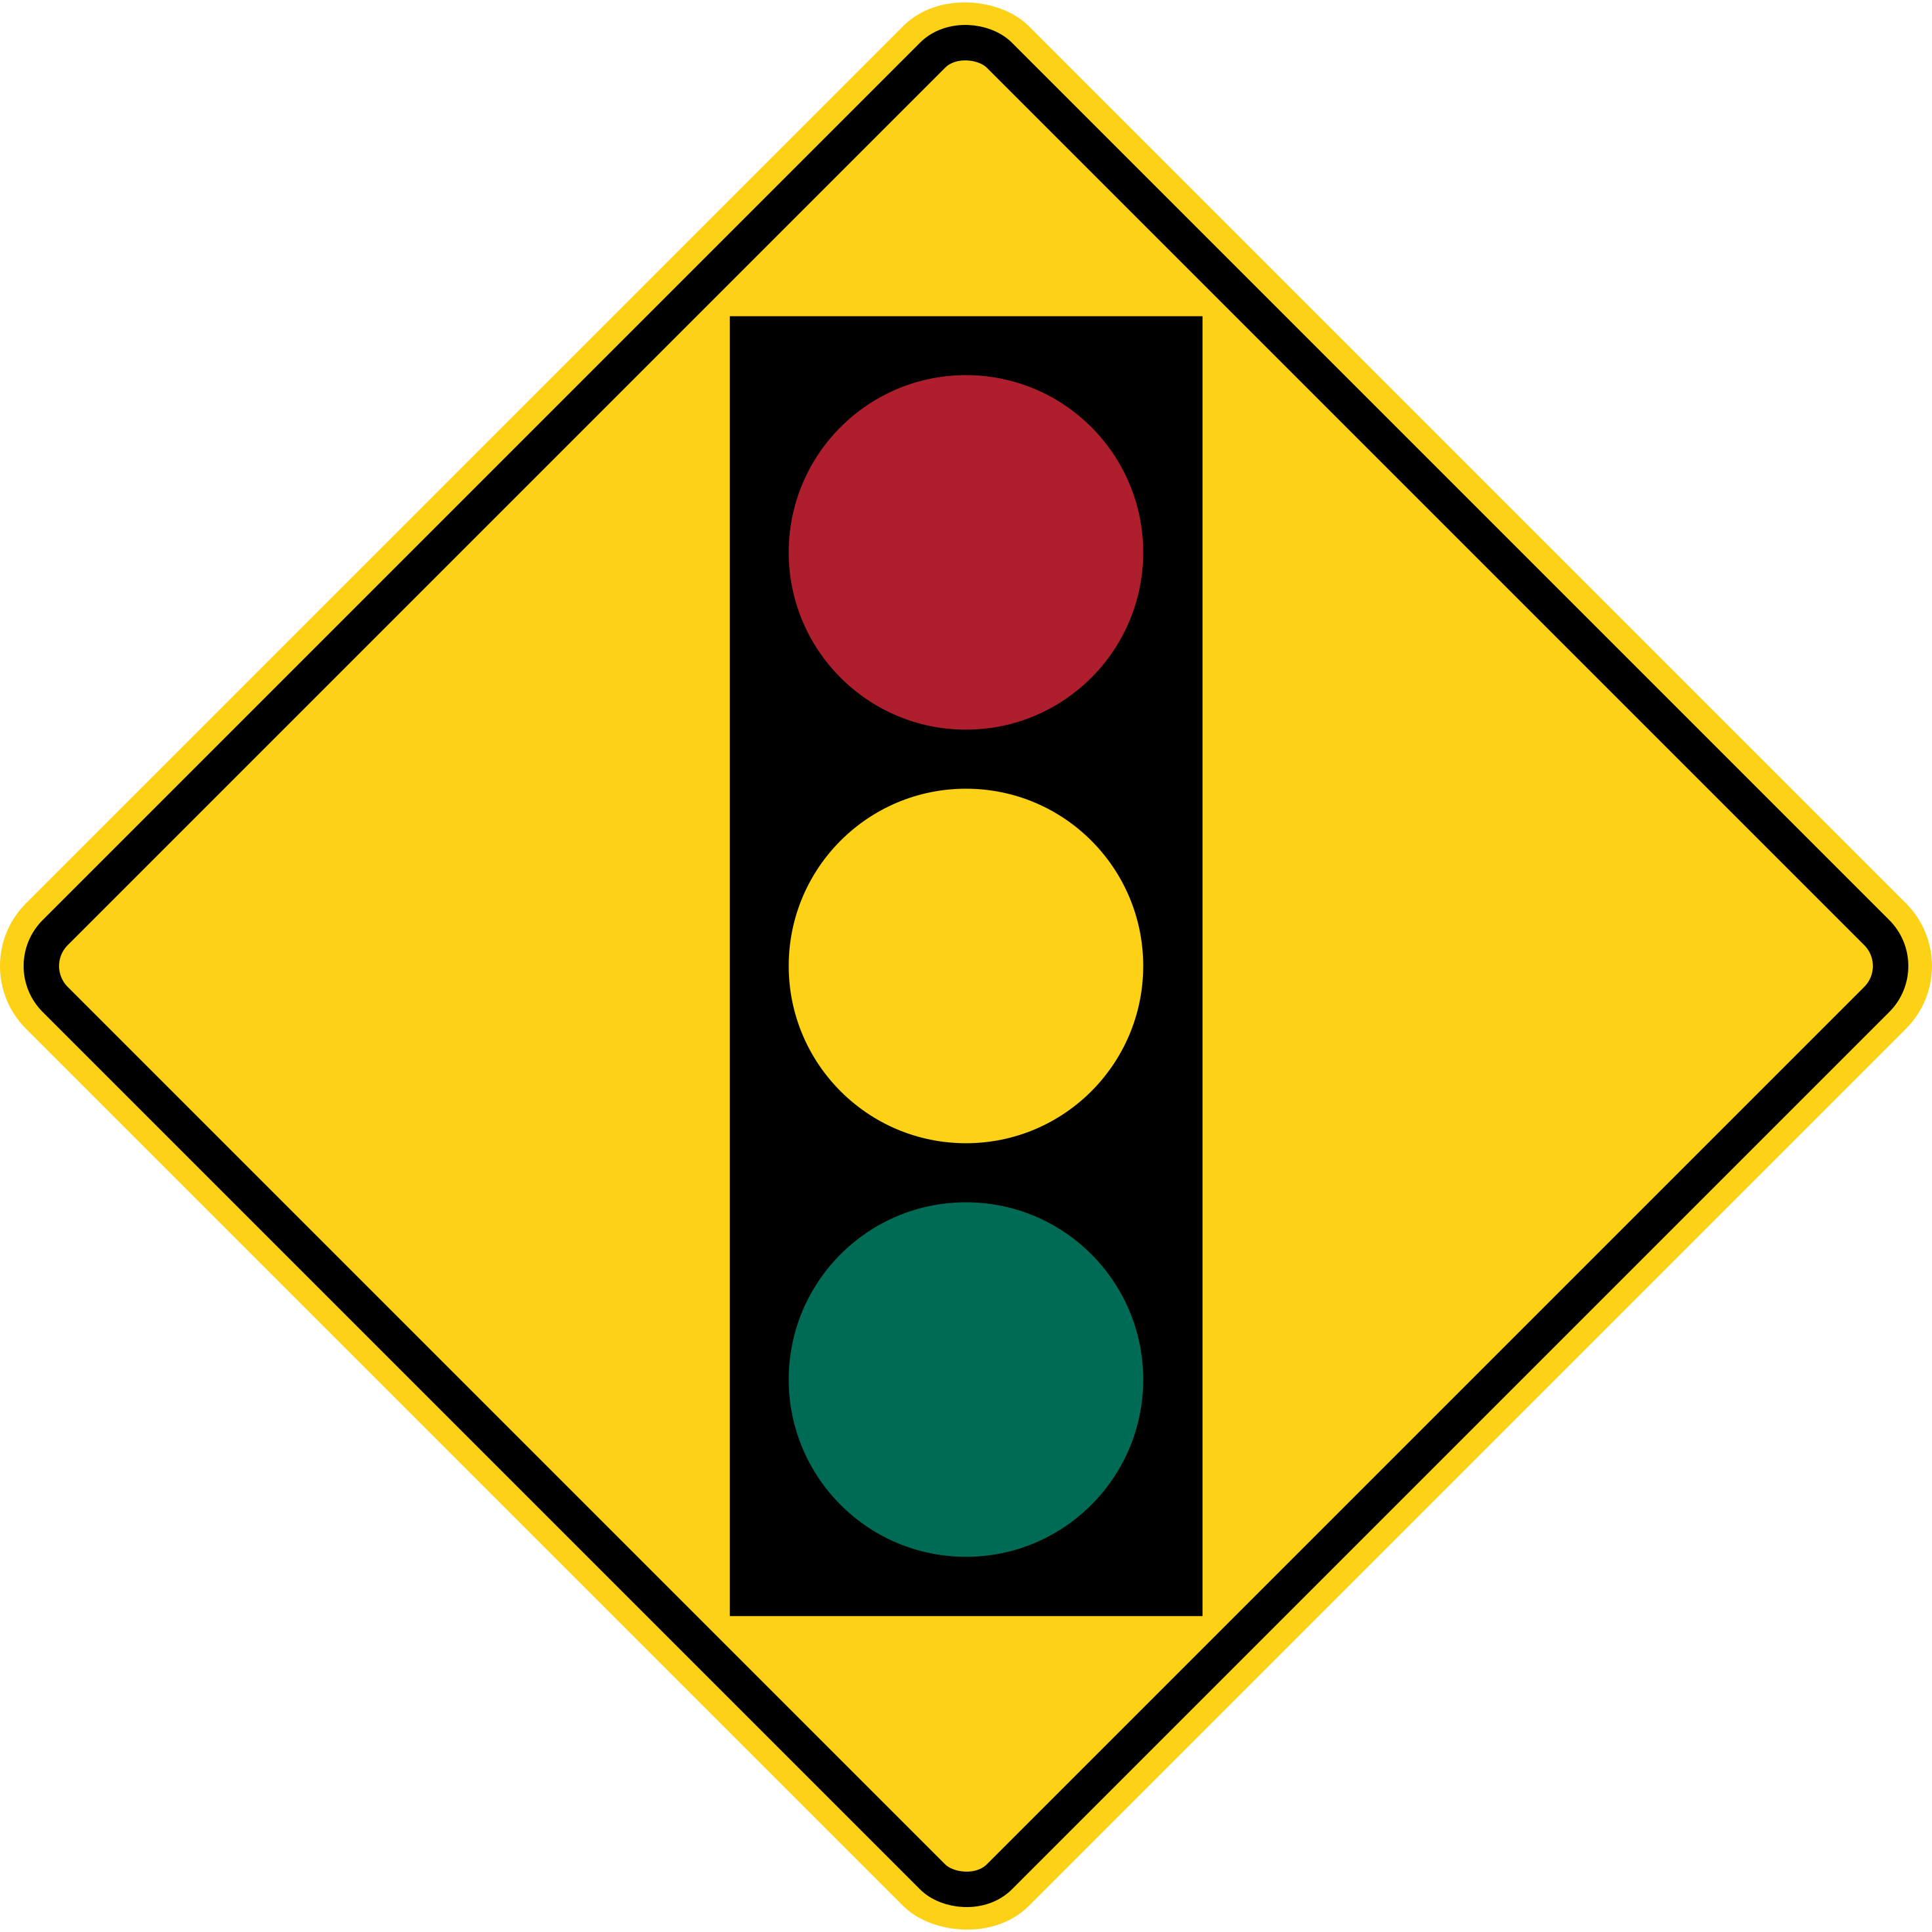
4. What does this warning sign tell a driver is ahead?
- A stop sign is ahead; prepare to come to a full stop before the sign.
- A traffic light is ahead; prepare to stop if the light is red or changes. (correct)
- A yield sign is ahead; prepare to slow and give way to cross traffic.
- A railroad crossing is ahead; prepare to stop for an approaching train.
Why: The Signal Ahead diamond warns that a traffic light is coming and calls for you to be ready to stop if the light is red or changes when you reach it. The trap is the answer that reads this as Stop Ahead. Stop Ahead is also a yellow diamond, but its interior symbol is a red octagon, not the signal head printed on the sign in front of you.
-
5. What should you do when you approach this Pedestrian Crossing sign?

- Reduce speed and be ready to yield to pedestrians crossing the roadway ahead. (correct)
- Come to a full stop at the sign before continuing through the area.
- Pass the vehicle stopped at the crosswalk if no pedestrian is visible from your lane.
- Slow only when school-aged children are present in the crossing area.
Why: The yellow-green diamond warns that pedestrians may enter the roadway ahead, so slow down and be ready to yield to anyone stepping into or already in the crosswalk. Drivers who fall back on the red-octagon habit of halting at every serious-looking sign pick the come-to-a-full-stop answer instead.
-
6. What does this Stop Here For Pedestrians sign require of a driver?
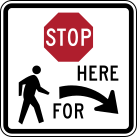
- Come to a complete stop for pedestrians at the marked crosswalk on the right. (correct)
- Yield to pedestrians and continue through the crosswalk if it is clear.
- Stop at the sign on every approach, whether or not a pedestrian is present.
- Slow down and watch for people who may cross the road ahead.
Why: The sign is a regulatory instruction to come to a full stop at the stop line for any pedestrian using the marked crosswalk on the right. The trap is the answer that treats it as an unconditional stop on every approach, which borrows the rule from the red octagonal stop sign; this device is triggered by a person in the crosswalk, not by arriving at the sign.
-
7. You are in the left lane and see this sign in a work zone. What does it require of you?

- Signal, match traffic speed in the right lane, and merge right before the taper. (correct)
- Stop at the taper and wait for a gap in traffic before merging.
- Race to the taper and cut in ahead of continuing traffic.
- Stay in the left lane; traffic in the right lane must yield to you.
Why: In a work-zone lane closure, the driver in the ending lane signals, matches the speed of the through lane, and merges right well before the taper. Racing to the taper and cutting in ahead of continuing traffic tempts drivers who treat the closure as a chance to gain position, the aggressive habit this advance warning is placed to prevent.
-
8. A lane is marked with this straight-or-right combination arrow. What does it permit a driver in that lane to do?

- Continue straight through the intersection or turn right. (correct)
- The lane is a right-turn-only lane; you must turn right.
- You must go straight; turning right from this lane is not allowed.
- Continue straight, turn right, or make a U-turn.
Why: The combination arrow marks an optional-movement lane: a driver may either continue straight through the intersection or turn right from the same lane. The tempting wrong pick is the right-turn-only reading, which comes from treating the second arrowhead as if it were a standalone right-turn arrow and ignoring the straight shaft paired with it.
-
9. A single green rectangular sign at an intersection lists three destinations, each next to its own arrow. How should a driver use the sign?
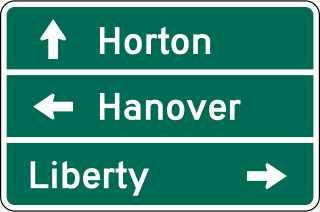
- Follow all three arrows in the order they appear on the panel.
- Read the line for your destination and follow that line's arrow. (correct)
- Take the top destination first because straight-ahead arrows sit above turns.
- Yield to any traffic turning toward the destinations shown on the sign.
Why: A destination guide panel packs up to three places onto one green sign, and each destination carries its own arrow. Find the line for the place you're going and follow only that arrow. The choice that says to follow all three arrows in order traps drivers carrying the habit of reading stacked turn-by-turn navigation prompts, where each line is the next move in one trip rather than a separate destination to pick from.
-
10. What does the number on this milepost tell a driver?
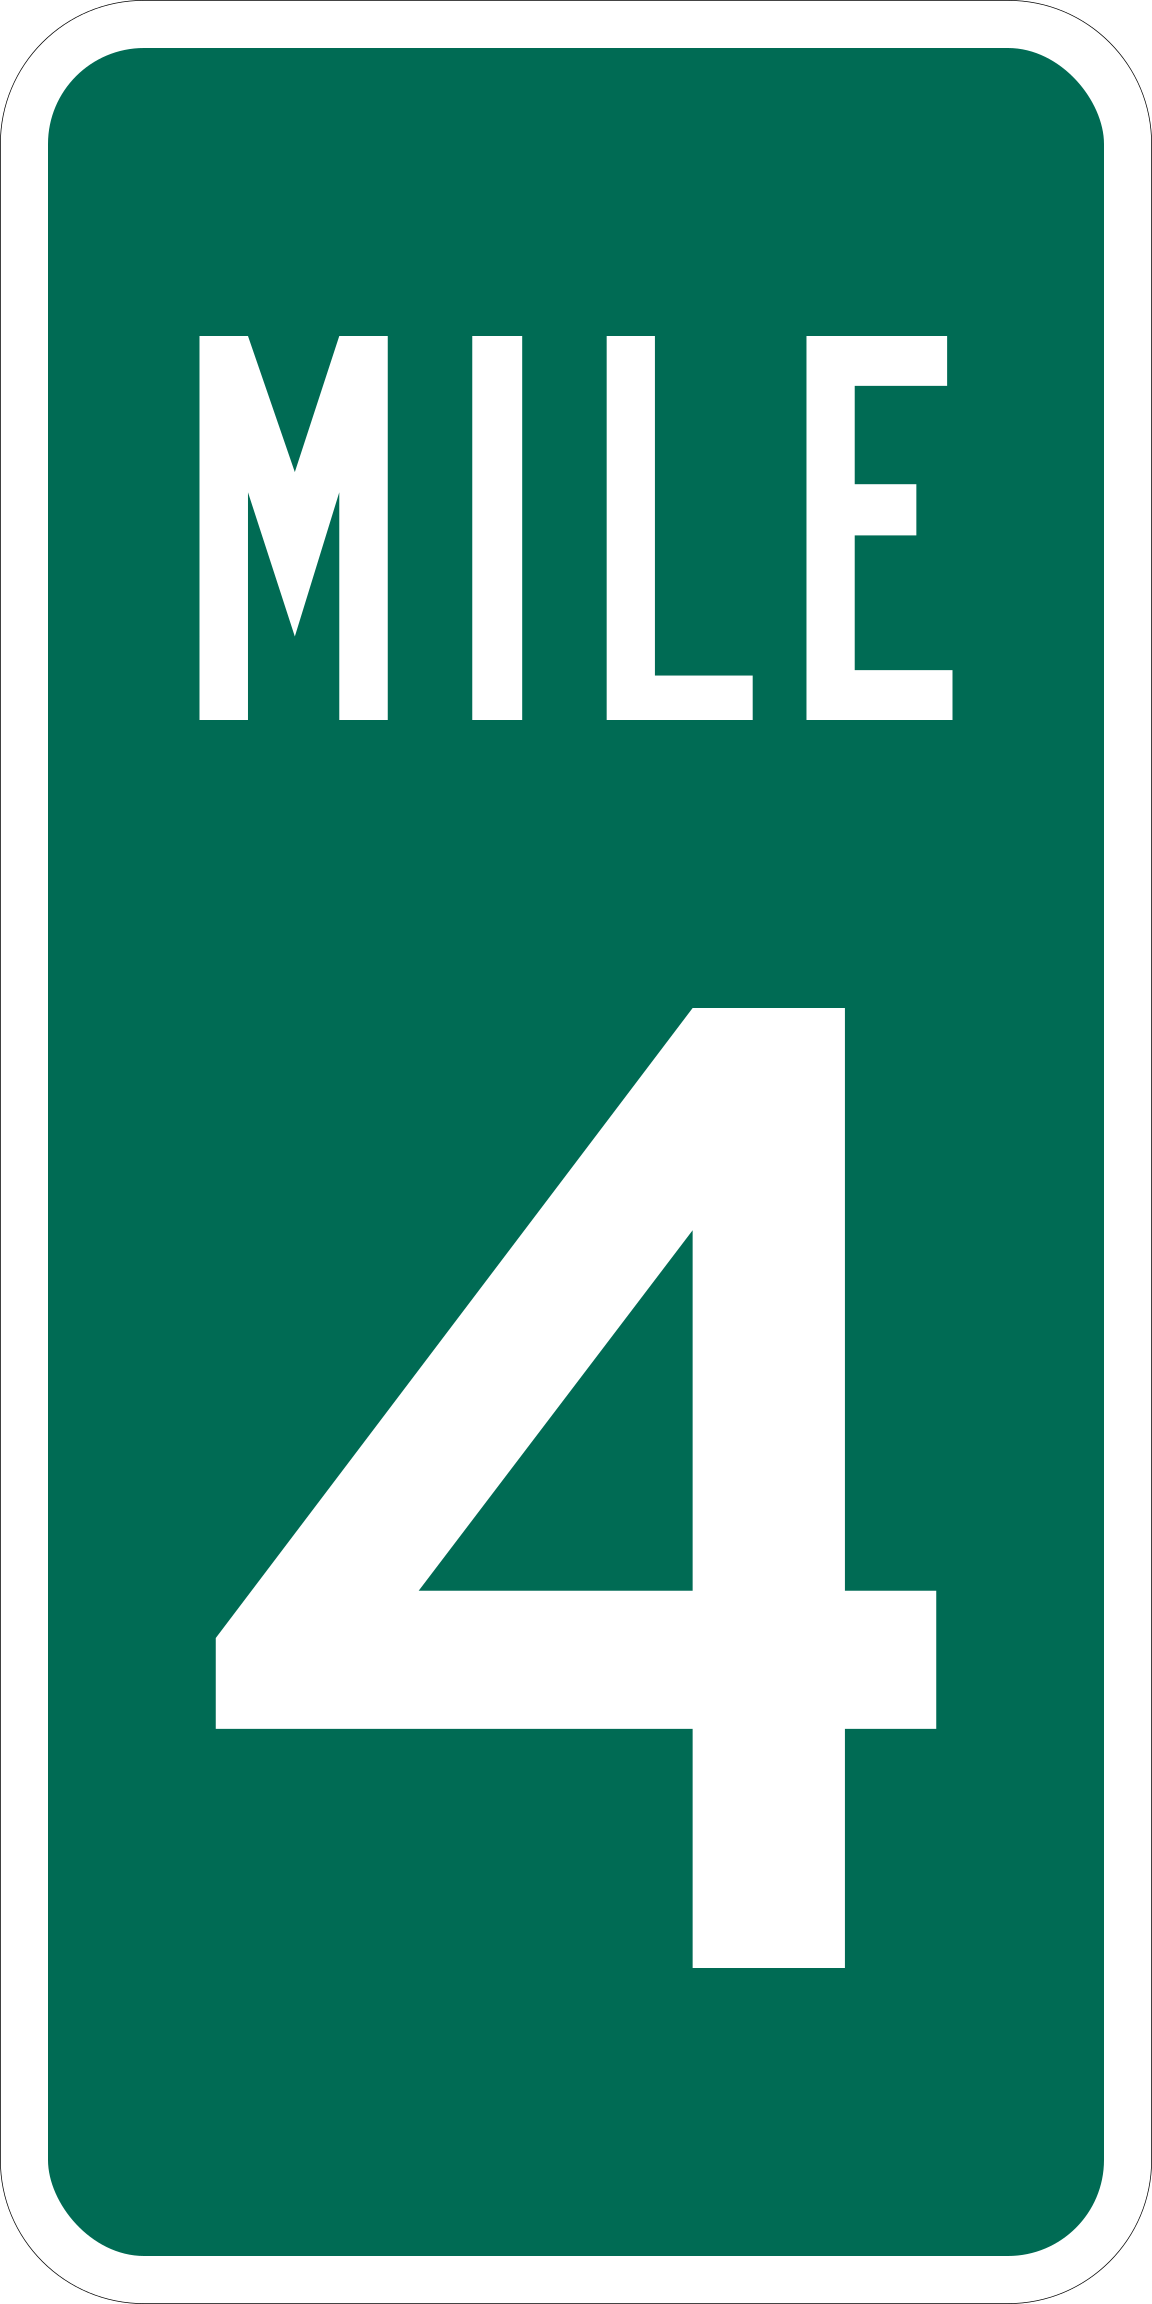
- Miles along the route from where it entered the state. (correct)
- The route number assigned to this highway.
- How many miles are left until the state line.
- The distance to the next numbered exit.
Why: Green milepost panels count up from the point where the route enters the state, giving a running mile count along the route rather than a distance to anywhere ahead. Depending on direction of travel the numbers may rise or fall, but they are not a countdown to the next border or exit. The "miles left until the state line" answer is the trap for drivers used to watching a GPS clock down to a destination. They expect the milepost to work the same way and read the panel as miles remaining rather than miles counted since entering.
Where to go next.
Ready for a longer go? Take the full Colorado practice test or jump into the topic study guide.
This diagnostic is one snapshot. The Colorado book unlocks a companion that turns it into a ranked study plan and re-ranks your weakest topics every time you practice, so the top of the list is always what to drill next.